You can move Advanced pins in the same way that you move Position pins. But you can also use them to rotate and scale the area of the image. You’ll replace the Position pins in the pincers with Advanced pins. Bend pins don’t affect position, but they do let you rotate or scale an area while keeping it in place. You’ll add Bend pins to the middle of the crab’s swimmer legs. Then, you’ll display the mesh that After Effects creates to determine the area of influence for each pin.
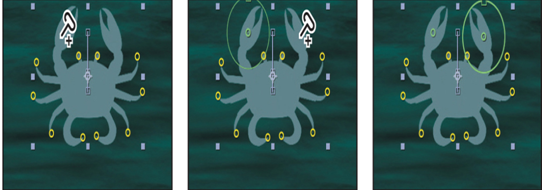
- Select the Selection tool in the Tools panel. Then, select and delete each of the Position pins in the pincers.
- Select the Puppet Advanced Pin tool (
), hidden beneath the Puppet Position Pin tool in the Tools panel.
- Place an Advanced pin in the middle of the left pincer, and then place another one in the middle of the right pincer.
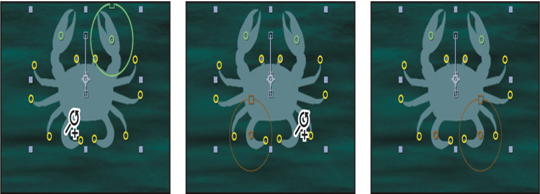
Advanced pins appear as dots surrounded by rings. To scale an area, drag the box in the ring outward or inward. To rotate an area, drag the ring itself clockwise or counter-clockwise. You’ll use the Advanced pins to animate the pincers.
- Select the Puppet Bend Pin tool ( ), hidden beneath the Puppet Advanced Pin tool in the Tools panel.
- Place a Bend pin in the middle of the crab’s left swimmer leg, and then place another one in the middle of the right swimmer leg.
Depending on the type of animation you’re performing, you may want to name the pins. In this case, you’ll name just the pincer and antenna pins.
- In the Timeline panel, select Puppet Pin 13, press Enter or Return, and rename the pin Left Pincer. Press Enter or Return again to accept the new name.
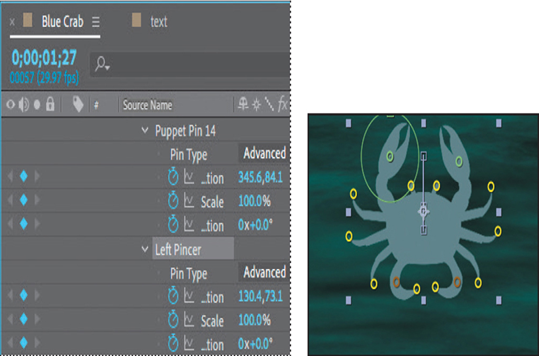
- Hide the pins’ properties. Then, rename the corresponding pins Right Pincer, Left Antenna, and Right Antenna. (They’re probably Puppet Pins 14, 3, and 4, respectively.) The default pin names are numbered in the order they were created. You do not need to name the pins on the legs unless you want to.
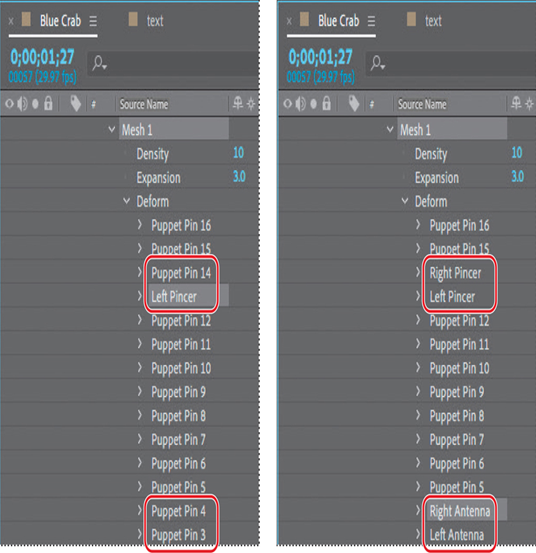
- Select Show in the options section of the Tools panel to display the distortion mesh.
The crab is nearly the same color as the triangles in the mesh, so you’ll need to change the mesh color. The mesh takes its color from the layer’s color label. - In the Timeline panel, click the color label next to the Crab.psd layer, and then choose a contrasting color, such as red or purple.
- Select Mesh 1 in the Crab.psd layer to display the mesh again.
Tip
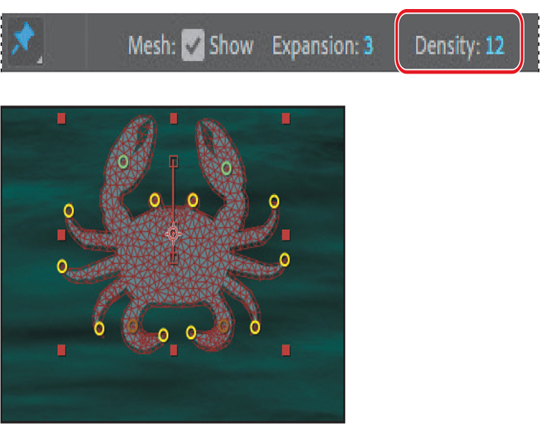
You can extend the mesh beyond the outline of the layer in order to ensure a stroke is included in the deformation. To expand the mesh, increase the Expansion property in the options section of the Tools panel. - Change the Density value in the options section of the Tools panel to 12. You may need to select Mesh 1 to see the mesh again.
The Density setting determines how many triangles are included in the mesh. Increasing the number of triangles results in a smoother animation, but also increases rendering time.
12. Choose File > Save to save your work so far.