You’re nearly done. All you need to do is to add the animated title between the bird and the background.
- Deselect all layers, and then move the current-time indicator to the beginning of the time ruler.
- Select the Type tool (
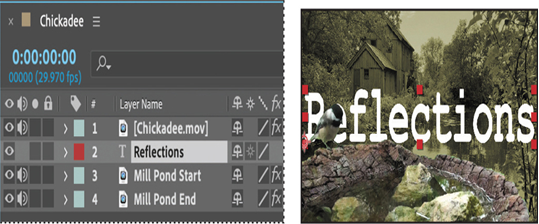
), and then type Reflections in the Composition panel.
A new text layer named Reflections appears in the Timeline panel at the top of the layer stack.
- Select the Reflections layer, and then do the following in the Text section of the Properties panel:
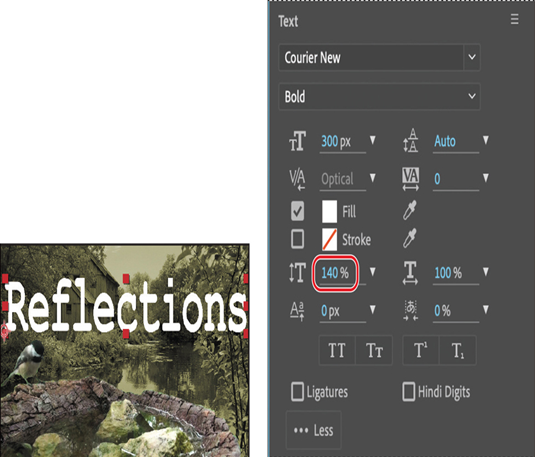
• Choose Courier New for the font.
• Choose Bold for the font style.
• Type 300 px for the font size.
• Choose Optical from the Kerning menu.
• Select white for the Fill color.
• Deselect the Stroke checkbox. - Click the More button, and then type 140% for the vertical scale.
- Use the Selection tool ( ) to reposition the text to rest along the top edge of the rock pool, and then move the Reflections layer below the Chickadee layer.
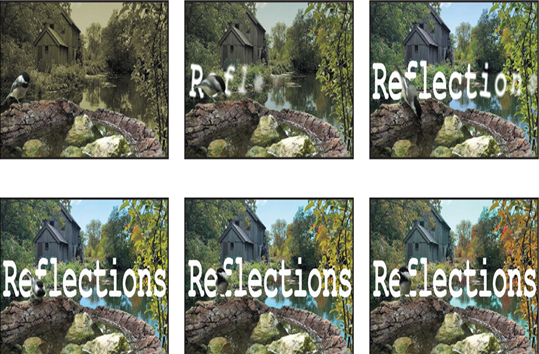
You’ll animate the text so that it appears on the screen in a liquid motion.
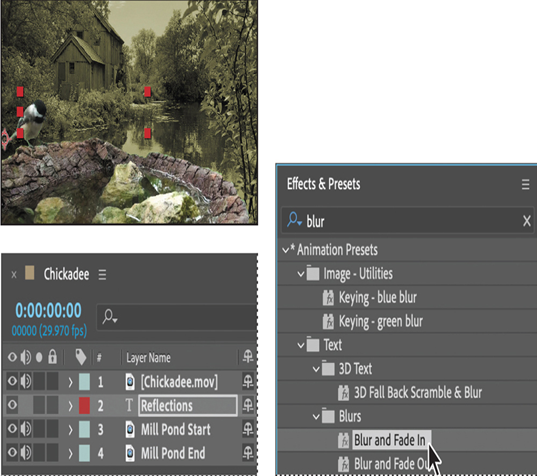
- Make sure you’re at the beginning of the timeline and the Reflections layer is selected. In the Effects & Presets panel, type blur in the search box. Under Text, double-click the Blur And Fade In preset.
- Deselect all layers in the Timeline panel, and move the current-time indicator to the beginning of the time ruler. Press the spacebar to preview the clip.
- Choose File > Save to save your work.
Outputting your project
You’ll render your movie to complete the project.
- Choose File > Export > Add To Render Queue.
- In the Render Queue panel, click the blue words Best Settings.
- In the Render Settings dialog box, choose Half from the Resolution menu, and make sure Use Comp’s Frame Rate is selected in the Frame Rate area. Then click OK.

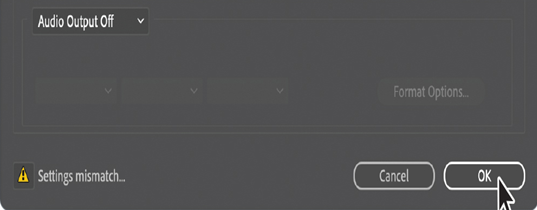
- Click the blue text next to Output Module. Then, at the bottom of the Output Module Settings dialog box, choose Audio Output Off, and click OK.
- Click the blue text next to Output To. In the Output Movie To dialog box, navigate to the Lessons/Lesson09/Finished_Project folder, and click Save.
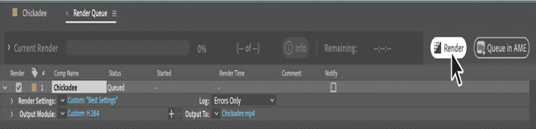
- Click Render in the top right corner of the Render Queue panel.
- When the project has rendered, save and close it.
Congratulations! You’ve separated a foreground object from the background, replaced and modified the background, and animated some text to complete the movie. You’re ready to use the Roto Brush tool on your own projects.