The final movie includes two lines of animated text. Because you imported the text.psd file as a composition with layers intact, you can work on it in its own Timeline panel, editing and animating its layers independently. You’ll add an animation preset to each layer.
- Drag the text composition from the Project panel into the Timeline panel, placing it at the top of the layer stack.
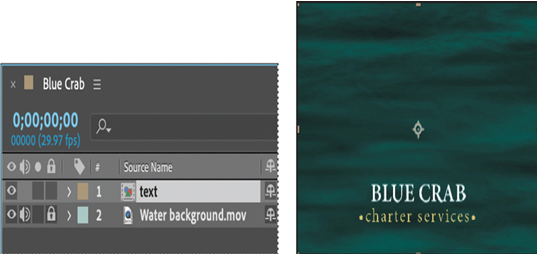
- Double-click the text composition to open it in its own Timeline panel.
- Shift-click to select both layers in the text Timeline panel, and choose Layer > Create > Convert to Editable Text.
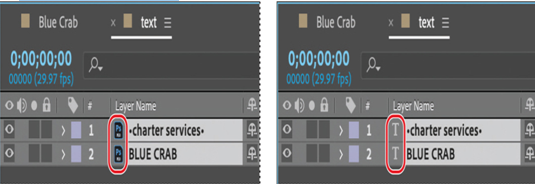
Now the text layers can be edited, so you can apply animation presets.
- Go to 3:00. Then deselect both layers, and select only the BLUE CRAB layer.
- In the Effects and Presets panel, search for the Fly In With A Twist animation preset. Then drag it onto the BLUE CRAB layer.
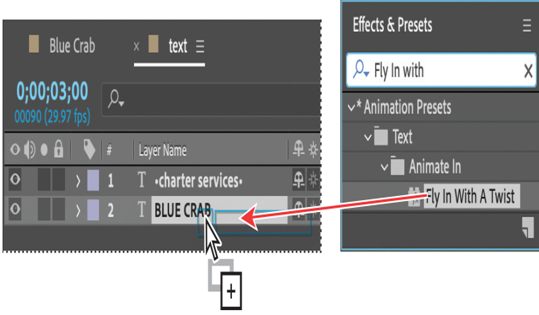
By default, the animation preset lasts just over two and a half seconds, so the text will begin to fly in at 3:00 and finish at 5:16. After Effects adds the keyframes for the effect.
- Go to 5:21, and select the charter services layer.
- In the Effects and Presets panel, search for the Slow Fade On animation preset. Then drag it onto the charter services layer.
- Return to the Blue Crab Timeline panel, and move the current-time indicator to the beginning of the time ruler. Press the spacebar to preview the animation. Press the spacebar again to stop playback.
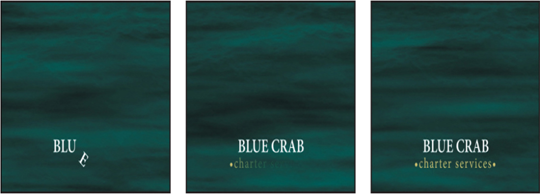
9. Choose File > Save to save your work so far.
Scaling an object
Next, you’ll add the crab. You’ll animate it so that it fills the screen at the beginning of the movie, and then quickly shrinks and moves into position above the area where the text will appear.
- Drag the crab.psd file from the Project panel to the top layer in the Timeline panel.
- Press the Home key to move the current-time indicator to the beginning of the time ruler.
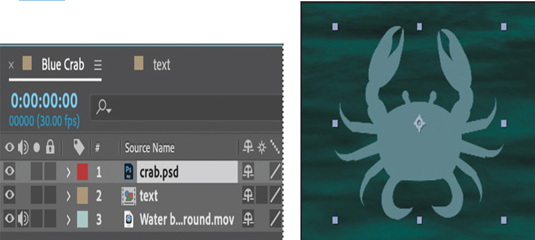
- Select the crab.psd layer in the Timeline panel, and change its Scale value to 400% in the Properties panel.
- Click the stopwatch icon ( ) next to Scale to create an initial keyframe.
- Move to 2:00, and change the Scale to 75%.
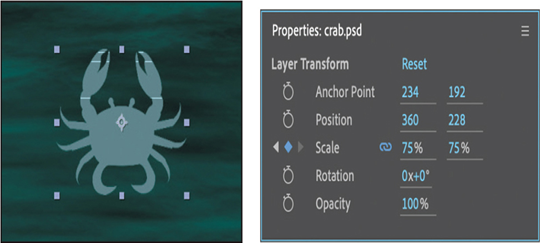
The crab scales appropriately, but its position isn’t quite right.
- Press the Home key to return to the beginning of the time ruler.
- In the Properties panel, change the Position to 360, 82. The crab moves up to fill the composition.
- Click the stopwatch icon next to Position to create an initial keyframe.
- Go to 1:15, and change the Position to 360, 228.
- Go to 2:00, and change the Position to 360, 182.
- Drag the current-time indicator across the first two seconds of the time ruler to see the crab animation.
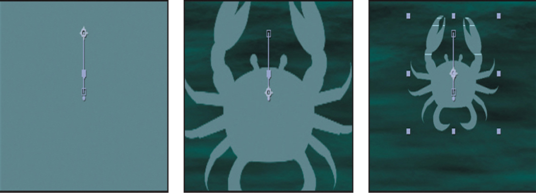
- Hide the properties for the crab.psd layer, and choose File > Save.
