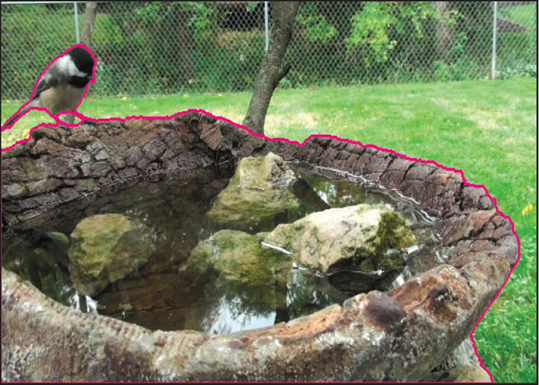
To use the Roto Brush tool to isolate a foreground object, you start by adding strokes to a base frame to identify foreground and background areas. You can start on any frame in the clip, but in this exercise, you’ll use the first frame as the base frame. First, you’ll add the strokes that identify the bird and the rock pool as the foreground objects.
- Move the current-time indicator across the time ruler to preview the footage.
- Press the Home key to move the current-time indicator to the beginning of the time ruler.
- Select the Roto Brush tool (
) in the Tools panel.
You use the Roto Brush tool in the Layer panel, which you’ll open now.
- Double-click the Chickadee.mov layer in the Timeline panel to open the clip in the Layer panel.
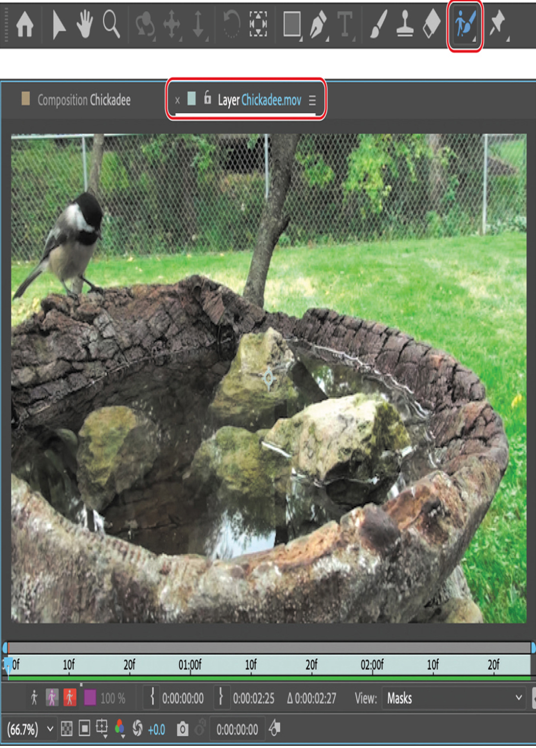
- Choose Fit from the Magnification Ratio pop-up menu at the bottom of the Layer panel if you don’t see the entire image clearly.
By default, the Roto Brush tool creates green foreground strokes. You’ll start by adding strokes to the foreground—the rock pool and the bird. Generally, it’s most efficient to start with broad strokes and then use smaller brushes to refine the border. - Choose Window > Brushes to open the Brushes panel. Set up a hard round 100-pixel brush. (You may need to resize the Brushes panel to see the options.)
When you’re drawing strokes to define the foreground object, follow the skeletal structure of the subject. Unlike traditional rotoscoping, you don’t need to define a precise boundary around the object. Start with broad strokes, and work down to small regions as After Effects determines where the boundary is supposed to be.
Tip
You can quickly zoom in and out of the Layer panel using the scroll wheel on your mouse, if it has one.
- Draw a green stroke horizontally across the rock pool.
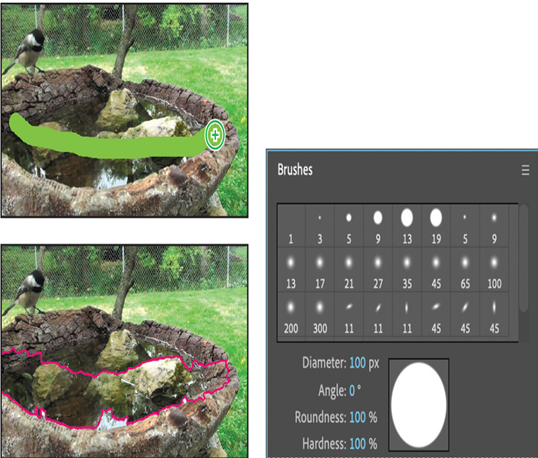
Roto Brush tool properties appear in the Effect Controls panel. In the Layer panel, a magenta outline identifies the boundaries After Effects created for the foreground object. After Effects recognized only about half of the pool, because you initially sampled only a small area of the subject. You’ll help After Effects find the boundary by adding some more foreground strokes. First, you’ll make sure you’re using version 3 of the Roto Brush tool.
- In the Effect Controls panel, make sure 3.0 is selected for the Version.

- Still using a large brush, continue to draw green strokes along the inside edges of the pool. Do not include the branches directly behind the pool and the bird.

- Zoom to 200% and use the Hand tool ( ) to pan to the bird.
- Select the Roto Brush tool again. Then select a smaller brush, and draw a green stroke across the bird’s body.
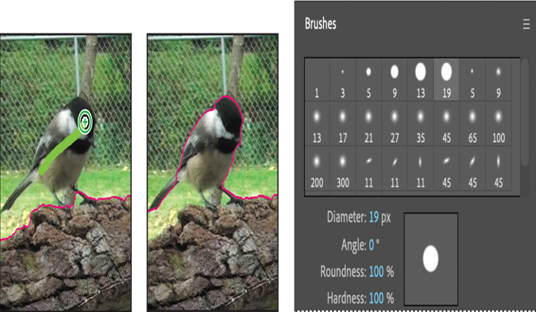
It can be tricky to get some areas without accidentally adding background as well. It’s okay if you haven’t captured every detail in the foreground. You’ll use background strokes to remove any extraneous areas of the matte.
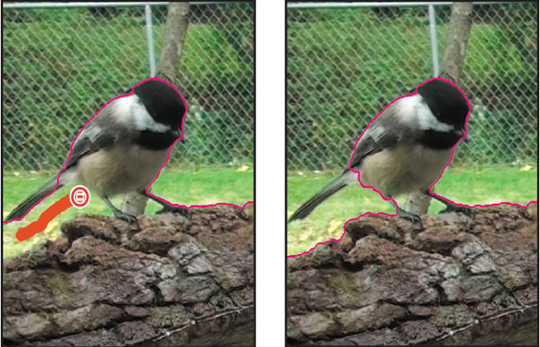
- Press Alt (Windows) or Option (macOS) to switch to the red background stroke brush. Add red strokes to background areas you want to exclude from the matte.
- Switch back and forth between the foreground and background brushes and brush sizes to fine-tune the matte. Don’t forget to deselect the branches directly behind the bird and the pool. In some cases, one click may be all it takes to exclude an object or area from the matte.
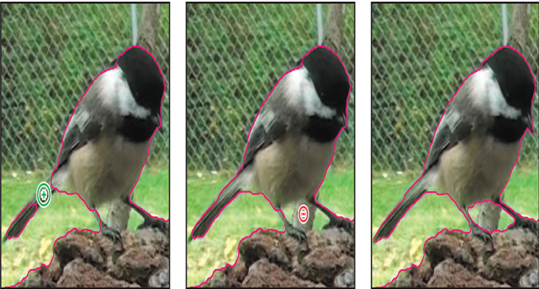
- When you’re happy with the bird’s matte, zoom back out and fine-tune any remaining areas that need to be addressed with the rock pool.
