The video includes three scenes, which you need to edit independently. You’ll rearrange the order of the scenes, change the length of each, apply different color corrections, replace the background in one, and clone an object in the final scene. All of these edits are much easier to perform in separate layers. You’ll use Scene Edit Detection to split the layers, but first, you’ll mute the composition’s audio to remove the static noise so it doesn’t carry over to the new scenes.
- Press the Home key or move the current-time indicator to the beginning of the composition.
- Click the Audio switch for the Collectibles.mp4 layer to mute its sound.

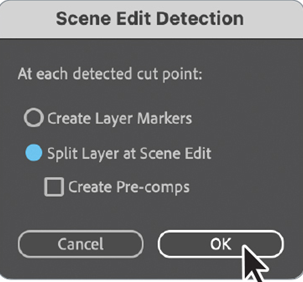
- With the Collectibles layer selected, choose Layer > Scene Edit Detection.
- In the Scene Edit Detection dialog box, select Split Layer At Scene Edit, and click OK.

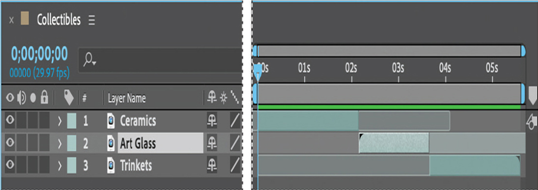
After Effects splits the footage into three layers, each with the same name as the original file. Notice that all three layers are muted. The footage begins with the bottom layer (layer 3) and ends with the top layer (layer 1). You’ll reorganize the layers.

- Select the top layer, press Enter or Return, and rename the layer Trinkets. Press Enter or Return again to accept the new name.
- Repeat step 5 to rename the middle layer Ceramics and the bottom layer Art Glass.
- In the Timeline panel, drag the Ceramics layer to the top of the layer stack. Drag the Trinkets layer to the bottom.
- Drag the footage to match the layer order: Drag the Ceramics layer to the beginning of the timeline (0:00); drag the Art Glass layer to 2:05; and make sure the Trinkets layer starts at 3:20.

- Choose File > Save to save your work so far.
Making color enhancements
You’ll use color-correction effects to make some subtle enhancements to the Ceramics clip, punching up the color and increasing the contrast.
Adjusting saturation
The hue is the actual color of an image, while saturation is the purity of that image. With the Hue/Saturation effect, you can adjust the hue, saturation, or lightness of an image.
You’ll start by adjusting the saturation in the Ceramics clip.
- Press the Home key or move the current-time indicator to the beginning of the composition.
- Select the Ceramics layer in the Timeline panel.
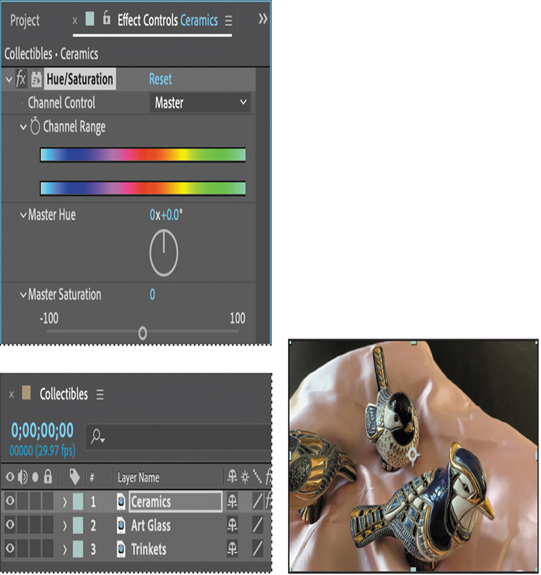
- Choose Effect > Color Correction > Hue/Saturation.
The Hue/Saturation effect options appear in the Effect Controls panel.

First, you’ll punch up the color by adjusting the saturation.
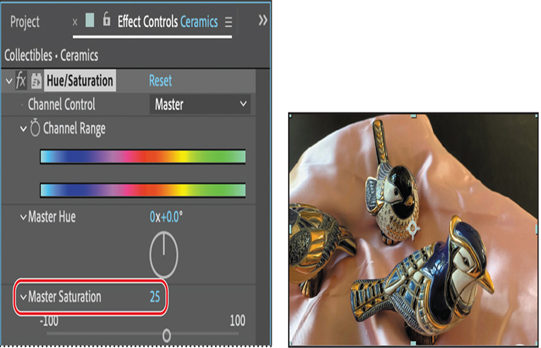
- Increase the Master Saturation to 25.

All of the colors are slightly more intense, particularly the pink cloth. Now you’ll enhance the shimmer in the metallic finishes by increasing just the yellow value.
- From the Channel Control menu, choose Yellows.
- Increase the Yellow Saturation to 25.
7. Hide the Hue/Saturation properties in the Effect Controls panel.
