You can work with a clip in both Adobe Premiere Pro and After Effects, moving easily between the two applications as you edit your project.
To edit an Adobe Premiere Pro clip in After Effects, do the following:
- Right-click or Control-click the clip in Adobe Premiere Pro, and choose Replace With After Effects Composition.
After Effects starts, and opens the Adobe Premiere Pro clip. - Save the project when you’re prompted by After Effects. Then, work in the composition just as you’d work in any other After Effects project.
- When you’re finished, save the project, and return to Adobe Premiere Pro.
Your changes are automatically reflected in the timeline.
Don’t worry about being exact about your brush strokes. Just make sure the matte is within 1 to 2 pixels of the edge of the foreground object. You’ll have an opportunity to refine the matte later. However, After Effects uses the information on the base frame to adjust the matte for the rest of the span, so you want the matte to be accurate.

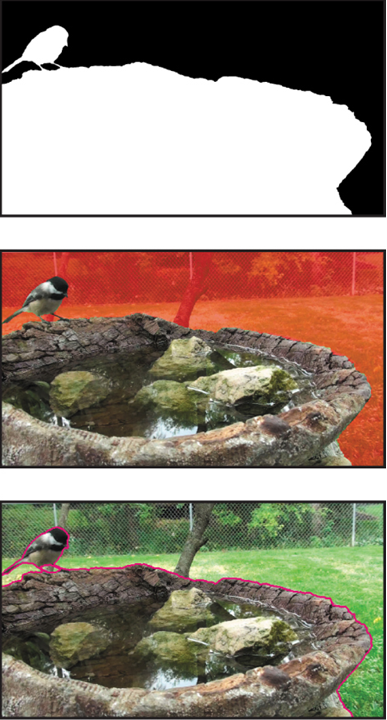
- Click the Toggle Alpha button ( ) at the bottom of the Layer panel. The selected area is white against a black background, so you can see the matte clearly.
- Click the Toggle Alpha Overlay button ( ) at the bottom of the Layer panel. The foreground area appears in color, and the background has a red overlay.
- Click the Toggle Alpha Boundary button ( ) at the bottom of the Layer panel to see the outline around the bird and rock pool again.
As you use the Roto Brush tool, the Alpha Boundary is the best way to see how accurate your boundary is, because you can see everything in the frame. However, the Alpha and Alpha Overlay options let you see your matte without the distraction of the background.
