Act it out with Adobe Character Animator
If you identify strongly with your characters, you might want to use Adobe Character Animator instead of creating cumbersome keyframes. It’s especially useful if you’re creating a long scene or you need to match the character’s mouth to speech. It’s also a lot of fun.
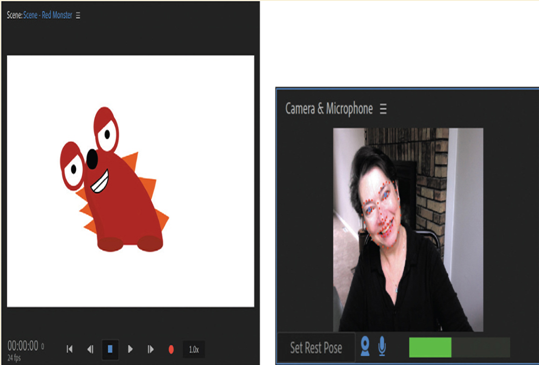
Character Animator is included in an Adobe Creative Cloud membership. With it, you can import a character you’ve created in Photoshop or Illustrator, and then act out facial gestures and head movements in front of your webcam; your character mirrors your gestures on the screen. If you speak, the character’s mouth moves to match your words.
You can move other body parts, such as legs and arms, using keyboard shortcuts or your mouse or tablet. And you can set up dangling behavior so that, for example, if a rabbit’s head moves to the left, its ears dangle with it.
Character Animator includes some entertaining interactive tutorials to help you get started. To learn more, go to https://www.adobe.com/products/character-animator.xhtml.

Tips for a smooth animation experience
- Create different layers for different moving parts: draw the mouth on one layer, the right eye on another, and so on.
- Name layers so Character Animator will recognize them. Certain words, such as “pupil,” help map the character to the image in the camera.
- Practice facial and other gestures before recording. Once you’ve set your Rest Pose, try different mouth shapes, eyebrow raises, head waggles, and other movements to see how subtle or exaggerated movements translate for your character.
- Speak into the microphone as you record. Many mouth shapes are triggered by audio cues, such as “uh-oh,” and the character’s mouth movements will be synced to your words automatically.
- Especially at first, consider using an existing character file as a template. It’ll be easier to get the layer names right.
- Try animating objects that don’t have faces and bodies. For example, you can use Character Animator to animate clouds floating, a flag waving, or flowers opening. Be creative and have fun!
Review questions
1 What’s the difference between the Puppet Position Pin tool and the Puppet Advanced Pin tool?
2 When would you use the Puppet Starch Pin tool?
3 Describe two methods of animating pin positions.
Review answers
1 The Puppet Position Pin tool creates Position pins, which define the position of a portion of the image as the image is deformed. The Puppet Advanced Pin tool creates Advanced pins, which define the scale and rotation, as well as the position, of a portion of the image.
2 Use the Puppet Starch Pin tool to add Starch pins to an area that you want to remain more rigid while other areas of the object are distorted.
3 You can manually animate pin positions by changing the position for each pin in the Timeline panel. To animate pin positions more quickly, use the Puppet Sketch tool: With the Puppet Position Pin tool selected, press Ctrl or Command, and drag a pin to record its movement.
