Tracking faces
The face-tracking feature in After Effects makes it easier to track a face or specific facial features, such as lips or eyes. Previously, tracking a face required roto brushing or complex keying.
Note
If you open the Lesson09_extra_credit.aep file, you may need to relink the Facetracking.mov asset.
- Choose File > New > New Project.
- Click the New Composition From Footage button in the Composition panel, and then navigate to the Lessons/Lesson09/Assets folder. Select the Facetracking.mov file, and click Import or Open.
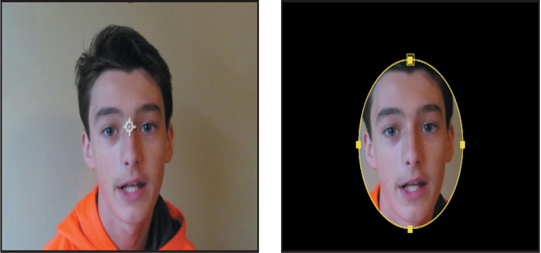
- Select the Facetracking.mov layer in the Timeline panel. Then, select the Ellipse tool, hidden by the Rectangle tool in the Tools panel.
- Drag an elliptical mask roughly covering the face.

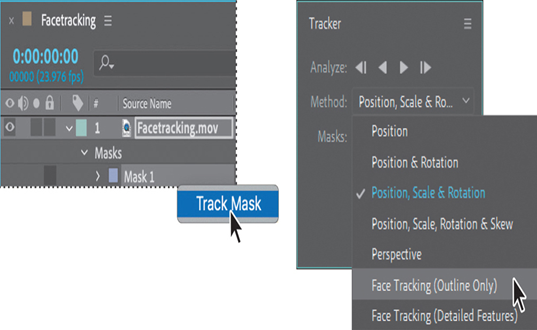
- Right-click the Mask 1 layer, and choose Track Mask.
- In the Tracker panel, choose Face Tracking (Outline Only) from the Method menu.

The Face Tracking (Outline Only) option tracks the entire face. The Face Tracking (Detailed Features) option tracks the outline plus the lips, eyes, and other distinctive facial features. You can export detailed facial data for use in Character Animator, or you can use it in After Effects to apply effects or to match it with another layer, such as an eye patch or a hat.
- Click the Track Forward button in the Tracker panel.

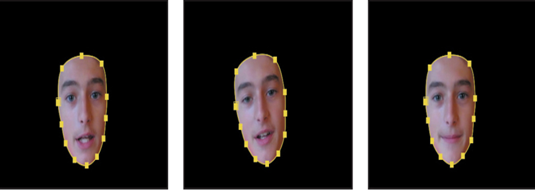
The Tracker tracks the face, changing the mask’s shape and position as the face moves.
- Press the Home key to return to the beginning of the timeline, and then move the current-time indicator across the time ruler to see how the mask moves with the face.
- In the Effects & Presets panel, search for Bright. Then drag the Brightness & Contrast effect onto the Facetracking.mov layer in the Timeline panel.
- Expand Effects > Brightness & Contrast > Compositing Options in the Timeline panel.
- Click the + icon next to Compositing Options. Choose Mask 1 from the Mask Reference 1 menu, and increase Brightness to 50.
The masked area of the face brightens, but nothing else does. This setting is too bright, and the edge of the mask is too abrupt. You’ll make it more subtle. - Reduce the Brightness to 20.
- Expand the Mask 1 properties. Change the Mask Feather property to 70, 70 pixels.
- Save the project to the Lessons/Lesson09/Finished_Project folder. Then close the file.
You can use the face tracker to blur a face, brighten it, or add any other effect. You can also invert the mask to affect everything but the face.
Review questions
1 When should you use the Roto Brush tool?
2 What is the segmentation boundary?
3 When should you use the Refine Edge tool?
Review answers
1 Use the Roto Brush tool any time you would have used traditional rotoscoping. It’s particularly useful for removing a foreground element from the background.
2 The segmentation boundary is the boundary between the foreground and background. The Roto Brush tool adjusts the segmentation boundary as you progress through the frames in the Roto Brush span.
3 Use the Refine Edge tool when you need to rotoscope objects with fuzzy or wispy edges. The Refine Edge tool creates partial transparency for areas of fine detail, such as hair. Use the Refine Edge tool only after you’ve adjusted the segmentation boundary across the entire clip.
